
Do It Yourself Ceiling Centre Installation
 Important – Please note that while this page advises on the mechanics of installing simple ceiling centrepieces, risks exist, particularly and especially for the “amateur” or inexperienced person working at whatever height these or other mouldings are fixed. The issue of personal safety must always be your primary consideration.
We advise here on fixing methods and techniques. All homeowners must seek advice from access equipment suppliers or hirers on safe, secure methods of working at height – all heights. You should seek the advice or (better still) the active assistance of someone experienced in construction. Additionally and equally importantly, electrical re-connection should be carried out by a qualified person.
This page deals exclusively with ceiling centrepiece installation. Please see the link above for DIY cornice installation . If you are fixing mouldings other than these please enquire specifically, we will always be pleased to advise you on any aspect of fitting this and other plaster decoration – homeowner, decorator or builder. In person, by ‘phone. However you wish.
 Other types of mouldings generally follow the methods outlined on this page. Again, please ask us, our contact details are below regarding possible differences, for instance setting out details.
Remember that we will happily provide you with a written cost for installing any mouldings at your home. We install throughout U.K. and beyond. Written quotes often given while you wait.
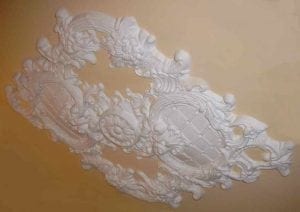
Please note that it is perfectly possible to replicate and replace damaged all or parts of existing centres. we can reinstate “as new” or to match your existing centres, whatever you wish.
General
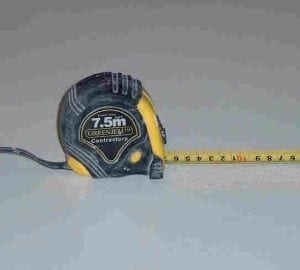
 To work with, prior to installation of cornice you will need these basic, essential items;- Tape measure, HB (or softer) Pencil. Also safe, secure access equipment.
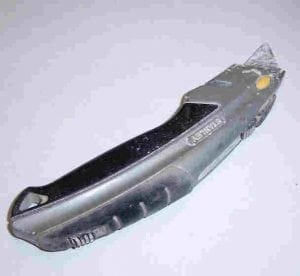
To actually fix centres you will also need;- Adhesive, Stanley Knife (or similar), small water brush.
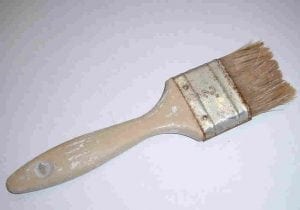
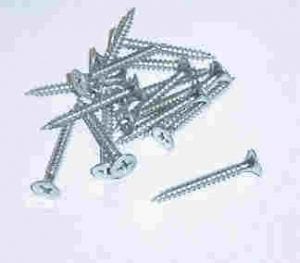
While not essential it would help if you also had;- Someone to help you (essential on larger designs of centre), flexible bowl, screws, screwdriver, “plasterer’s trowel end small tool”. Most (or all) of these items are illustrated on this page. Hover your mouse pointer over the image and the description should appear. Certainly on Internet Explorer, possibly not on “Firefox” and related browsers. You will also need an adhesive. We can provide /sell you the material we normally use and trust. Tile cement is, I believe a good adhesive – one that we’ve never used though! I can’t comment on “no-nails” or similar adhesives. They may well be OK, I just don’t know.
 This page neither hopes or claims to be complete, it is merely intended as a guide to “get you started”. But please don’t be too concerned because most of our staff are both able and certainly very willing to give advice on “DIY” installation of any of our mouldings.
Please note we close on almost all Sundays and open for less hours on Saturdays than our usual 08.00 to 16.30 midweek hours. Centrepieces can be delivered to you, please do ask. We charge for delivery to non-local addresses. However almost all of our ceiling centrepieces can fit into the “average sized” car or van.
Setting Out
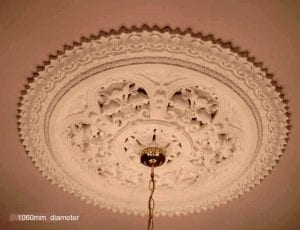
 Centres are often installed to the centre of room. However for a number of reasons this is not always possible or desirable. The most common reason being the light cable location – this can be away from centre and not possible (or desired to relocate).
 Some times you might wish to “centre” to windows, chimney-breast or other room feature / detail. One possibility is to “strike” diagonal lines from corners – possibly ignoring any alcoves.
For most centrepieces (except the smallest designs) you should expect two supporting joists to coincide with your centre. Typically these will be approximately these will be 15cm. / 150mm / 7″ from the central light cable. And parallel to each other. Mark these positions as accurately as possible with a pencil.
Preparation
If you have a lighting cable through your centre you should drill a hole, an oversized, generous hole with ample space to easily pass your cable through. This will remove some drama and effort from your fixing operation. You will almost certainly have an electrical connection box or “rose” of 7.5cm / 75mm. / 3″ diameter, possibly larger .
Naturally if a central ceiling light is absent please ignore that paragraph!. To help you choose a centrepiece for your home or project please do look at our catalogue page for suitable designs Centrepiece Catalogue . Or speak with any of our knowledgable members of staff.
If the existing cable position is “off centre” or varies from where you now want it to be, simply mark the required / new place, “burrow” a shallow slot to receive the cable and secure it somehow to the ceiling while you make any other necessary preparations. Please do ask.
What background are you fixing to? The best background is bare, unpainted new plaster. This needs no surface preparation. If the plaster ceiling is painted you should first break through this layer, score it deeply at the rim with a “criss cross” pattern toward the rim – where the perimeter adhesive will be applied. If the ceiling is papered this really should be removed at the same place.
Remember: Ossett Mouldings products should outlive all decorative surfaces, in my view should last the life of your home – these are permanent features, not mere / temporary decoration.
Installation
Make certain your working platform is safe and comfortable.
Make Sure power supply to cable is turned off, remove lamp fittings. Apply adhesive in “blobs” at approximately 120mm intervals to rim, also some “blobs” to inner raised areas.
Equip yourself (and helper) with battery operated screwdriver and screws that are sufficiently long to reach supporting timber joists. Raise centre into position, feed cable through hole and align (if appropriate) so that features such as leaf centres “centre” to centres of (for instance) chimney breast or walls / windows.
 When satisfied with position, drive screws through rim into joists above. Try to avoid screwing too close to edge – this may unnecessarily break a section of rim off. Not too difficult – simply an unnecessary chore.
Make sure screws are driven below finished surface of centre moulding. Fill the screw holes, also fill junction to ceilng with excess adhesive – also to a good surface finish. Fitted plaster mouldings dry out quite quickly, when they can then be decorated. As with any plaster surface, please avoid reflective (glossy) paint finishes as these usually spoil the appearance of your finished job – believe me this is very good advice.


